Creating a DIY accent wall can significantly enhance the aesthetics of any room. An accent wall allows for a splash of personality through color, texture, or design, transforming a plain space into a focal point. This simple yet impactful DIY project can be tailored to match personal style while being cost-effective and easy to execute.
With various materials and techniques available, anyone can embrace creativity. Whether using paint, wallpaper, or wood panels, the options are limitless. Each choice has the potential to reflect an individual’s unique taste, making the space feel more inviting and personal.
An accent wall is not just a decorative element; it can also influence the mood and functionality of a room. Engaging with this DIY project enables homeowners to take control of their design narrative, leading to a space that truly feels like home.
Planning Your DIY Accent Wall
Creating a DIY accent wall involves careful consideration of the wall’s placement, materials, and design. Thoughtful planning ensures that the accent wall becomes a focal point that enhances the overall aesthetic of the space.
Choosing the Right Wall
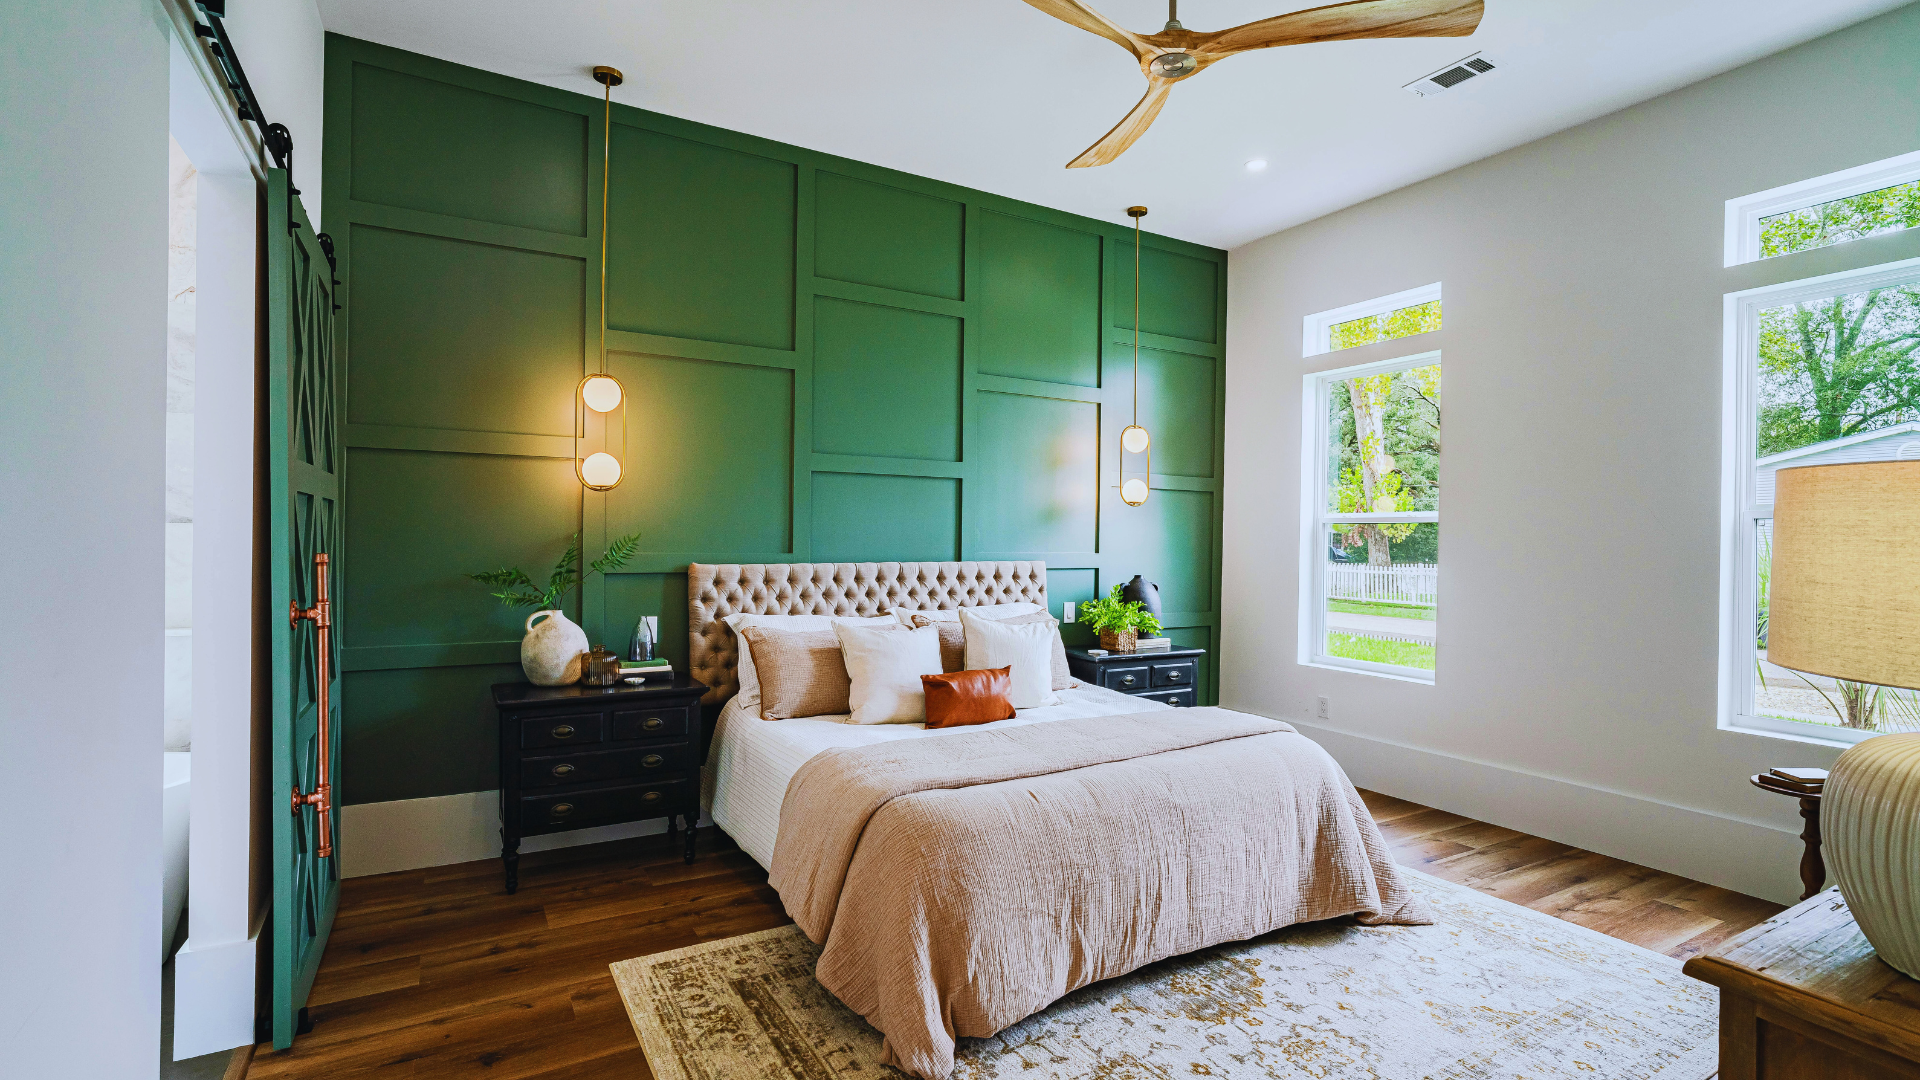
Select a wall that can serve as a striking focal point. Ideal candidates include walls behind furniture or near entryways. He or she should avoid walls with excessive windows or doors, as these may disrupt the intended design.
Consider using the wall that naturally draws attention, such as one seen immediately upon entering the room. Assess the wall’s size; larger walls can handle bolder designs, whereas smaller walls may benefit from simpler patterns.
Selecting Materials and Tools
Deciding on materials is crucial. Options include paint, wallpaper, wood panels, or even fabric. Each has its advantages. For example, paint offers versatility and ease, while wood panels can provide texture and warmth.
He or she should gather essential tools: a paintbrush or roller, measuring tape, level, and paint tray if using paint. For wallpaper or wood panels, additional tools may include a utility knife, adhesive, and a smoothing tool.
Carefully consider the finish; for instance, matte paint hides imperfections, while gloss finishes can make colors pop.
Design and Pattern Considerations
Design and pattern selection play a significant role in the accent wall’s success. Geometric patterns can add modern flair, while stripes or solid colors may create a classic look.
He or she should also consider the surrounding decor to ensure harmony.
A color palette that complements existing furniture enhances cohesion. It’s advisable to test samples on the wall surface to visualize the final effect.
For a striking effect, contrasting colors or bold patterns will stand out. Choosing a design that reflects personal style is essential, transforming the space into a true expression of individuality.
Preparing Your Space
Creating a DIY accent wall requires careful preparation. This involves ensuring the wall surface is ready and gathering the necessary supplies for a successful project.
Wall Preparation
Begin by selecting the wall to be transformed. Clear the area of furniture and decorations to provide ample workspace.
Next, assess the wall’s condition; it should be clean, dry, and free of cracks. Use a sander to smooth any rough patches, giving the surface a uniform texture.
For minor imperfections, fill in cracks or holes with spackling compound. Once dried, sand the patched areas for a smooth finish.
Clean the wall thoroughly with a damp cloth to remove dust and debris. It’s critical to apply painter’s tape along edges, such as trim or adjoining walls, to ensure sharp paint lines.
Gathering Supplies
Compile all necessary supplies before starting. Key items include:
- Paint: Choose a high-quality paint specifically designed for walls. Consider selecting a color that complements the room’s overall design.
- Tape: Painter’s tape is essential for marking off sections and ensuring clean lines.
- Sander: A medium-grit sander will help in smoothing the wall surface.
- Roller and Brush: These tools will facilitate the application of paint or wallpaper.
Additional items may include drop cloths to protect floors, a ladder for reaching high areas, and a roller tray. Having all materials on hand increases efficiency and minimizes interruptions during the project.
Installation Techniques
Transforming a space with a DIY accent wall requires specific techniques for effective execution. Focused methods allow for a range of styles, from modern patterns to classic textures, ensuring a personalized touch in any room.
Creating Patterns and Textures
To create visual interest, patterns like chevron or board and batten can be implemented. Chevron patterns involve placing boards at angles, forming a zigzag visual. This can be done by cutting boards at 45-degree angles and attaching them with a nail gun. Board and batten requires vertical boards spaced apart, filled, and caulked for a smooth finish.
For textured finishes, consider wood slat walls. These involve attaching slats of wood horizontally or vertically, giving depth. Proper measurements are crucial to ensure alignment and maintain a polished look. A level ensures even installation.
Applying Wallpaper and Paint
Wallpaper can dramatically change a room’s ambiance. When selecting wallpaper, consider adhesive types and designs that resonate with the space. Preparation involves cleaning the wall, applying primer, and measuring the wallpaper accurately. A smoothing tool helps eliminate bubbles during application.
For painted designs, stencils can replicate patterns effectively. It is essential to use painter’s tape to protect adjoining walls and ensure clean lines. Multiple coats may be needed for a vibrant look, with drying time accounted for.
Adding Dimension with Moulding and Woodwork
Moulding adds elegance to any accent wall. Baseboards or crown moulding can frame the wall, providing a polished edge. It is important to use a nail gun for secure fitting. Wood filler can fill gaps for a seamless look, then be sanded smooth.
Consider using various wood pieces for layered textures. This adds dimension without overwhelming the space. A contrast in paint color between the moulding and the accent wall heightens the visual appeal, drawing attention to the newly transformed area.
Accessorizing and Final Touches
Accessorizing a DIY accent wall enhances its visual appeal and completes the transformation of a space. Thoughtful decor choices can create a cohesive look or highlight the uniqueness of the feature wall.
Styling Your Feature Wall
Adding artwork or photographs can make a feature wall truly stand out. A gallery wall, featuring an array of framed pictures, can express personal style and offer a dynamic focal point. When arranging pieces, consider the following tips:
- Use a mix of frame sizes and styles for depth.
- Arrange items in a cohesive color palette to unify the display.
Incorporating slat walls adds texture, providing space for hooks or shelves. These options can help display decorative items, plants, or books, enhancing functionality while maintaining aesthetics. The use of lighting, such as sconces or spotlights, can also accentuate the texture and colors of the wall.
Incorporating Furniture and Decor
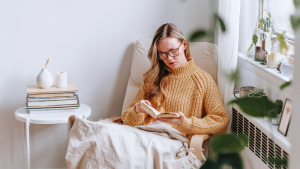
Selecting the right furniture is crucial in complementing an accent wall. A reading nook with comfortable seating can create an inviting atmosphere. Soft cushions, throws, and a small bookshelf can enhance the corner’s coziness.
When placing decor around the wall, consider the scale and proportion. A large vase or sculpture can provide a bold contrast, while smaller pieces add subtle interest. Group decor in odd numbers for a balanced look, and mix materials like wood and metal to create a layered effect.
Incorporating these elements ensures that the accent wall feels integrated into the space, rather than isolated.