Creating pottery and ceramic art is a rewarding endeavor that allows for personal expression and creativity. With the right materials and techniques, anyone can learn to make beautiful pieces that reflect their unique style. The journey into pottery begins with understanding the basic tools, types of clay, and firing processes essential for crafting functional or decorative items.
As artists work with their hands, they often find a meditative quality in shaping clay. Techniques such as hand-building, wheel throwing, and glazing can be explored to enhance their skills. Additionally, opportunities to learn through classes or online tutorials make this art form accessible to beginners and seasoned creators alike.
Exploring pottery not only offers a chance to produce stunning artwork but also promotes a sense of community among fellow enthusiasts. Engaging with local studios or workshops connects individuals with shared interests, fostering collaboration and inspiration.
Setting up Your Pottery Studio
Creating a pottery studio requires careful consideration of space, tools, and workspace organization. A well-set-up studio fosters creativity and enhances ceramics techniques.
Choosing the Right Space
Selecting an appropriate location is crucial. Ideally, the studio should offer sufficient space for working, storing materials, and displaying finished pieces.
Considerations:
- Size: Aim for a minimum of 100 square feet. This allows room for a wheel, kiln, and work surface.
- Lighting: Natural light is beneficial, so choose a space with ample windows. Adequate artificial lighting is essential for evening work.
- Ventilation: Proper airflow prevents fumes from affecting health. If using a kiln, ensure the space can accommodate its venting needs.
Essential Tools and Materials
An effective pottery studio requires specific tools and materials. Here’s a list of essentials:
- Potter’s Wheel: A key element for shaping clay.
- Kiln: Necessary for firing finished pots. Consider electric or gas options depending on availability and preference.
- Clay: Choose from stoneware, earthenware, or porcelain based on the desired outcome.
- Hand Tools: Include wire cutters, trimming tools, and sponges for molding and refining pieces.
Additionally, having accessories like aprons, buckets for water, and a sturdy work surface enhances productivity and organization.
Setting Up the Workspace
An organized workspace promotes efficiency. Each tool and material should have a designated place.
- Work Surface: A sturdy table makes hand-building and prepping clay easier.
- Storage Solutions: Use shelves, bins, and carts to keep materials organized. Labeling helps in quickly locating items.
- Safety Gear: Include gloves, masks, and safety glasses where necessary, especially when working with glazes and chemicals.
Plan for flexibility, allowing adjustments as skills and techniques evolve. A functional setup encourages experimentation and artistic growth in pottery.
The Pottery Making Process
Creating pottery involves a series of structured steps, each important for shaping and forming the final piece. This section details the methods of preparing clay, various techniques for building, and the firing processes that turn raw clay into durable ceramic art.
Preparing the Clay
Before starting any pottery project, proper clay preparation is crucial. Artists typically use earthenware, stoneware, or porcelain, depending on the desired outcome.
The first step is wedging, which involves kneading the clay to eliminate air bubbles. This process ensures uniform consistency and prevents cracks during firing.
Next, artists may hydrate the clay by adding water to achieve the appropriate moisture level. A moist consistency is vital for shaping and allows for better adhesion during construction.
Hand-Building Techniques
Hand-building is a foundational method in pottery. This approach includes several techniques, with slab construction and coil building being the most common.
In slab construction, the artist rolls out flat sheets of clay. They then cut and assemble these slabs into various forms. This method allows for intricate designs and patterns.
Coil building involves creating long rolls of clay, which are stacked and blended to form the walls of a pottery piece. This technique enables the creation of larger and more sculptural forms, showcasing an artist’s creativity and skills.
Throwing on the Wheel
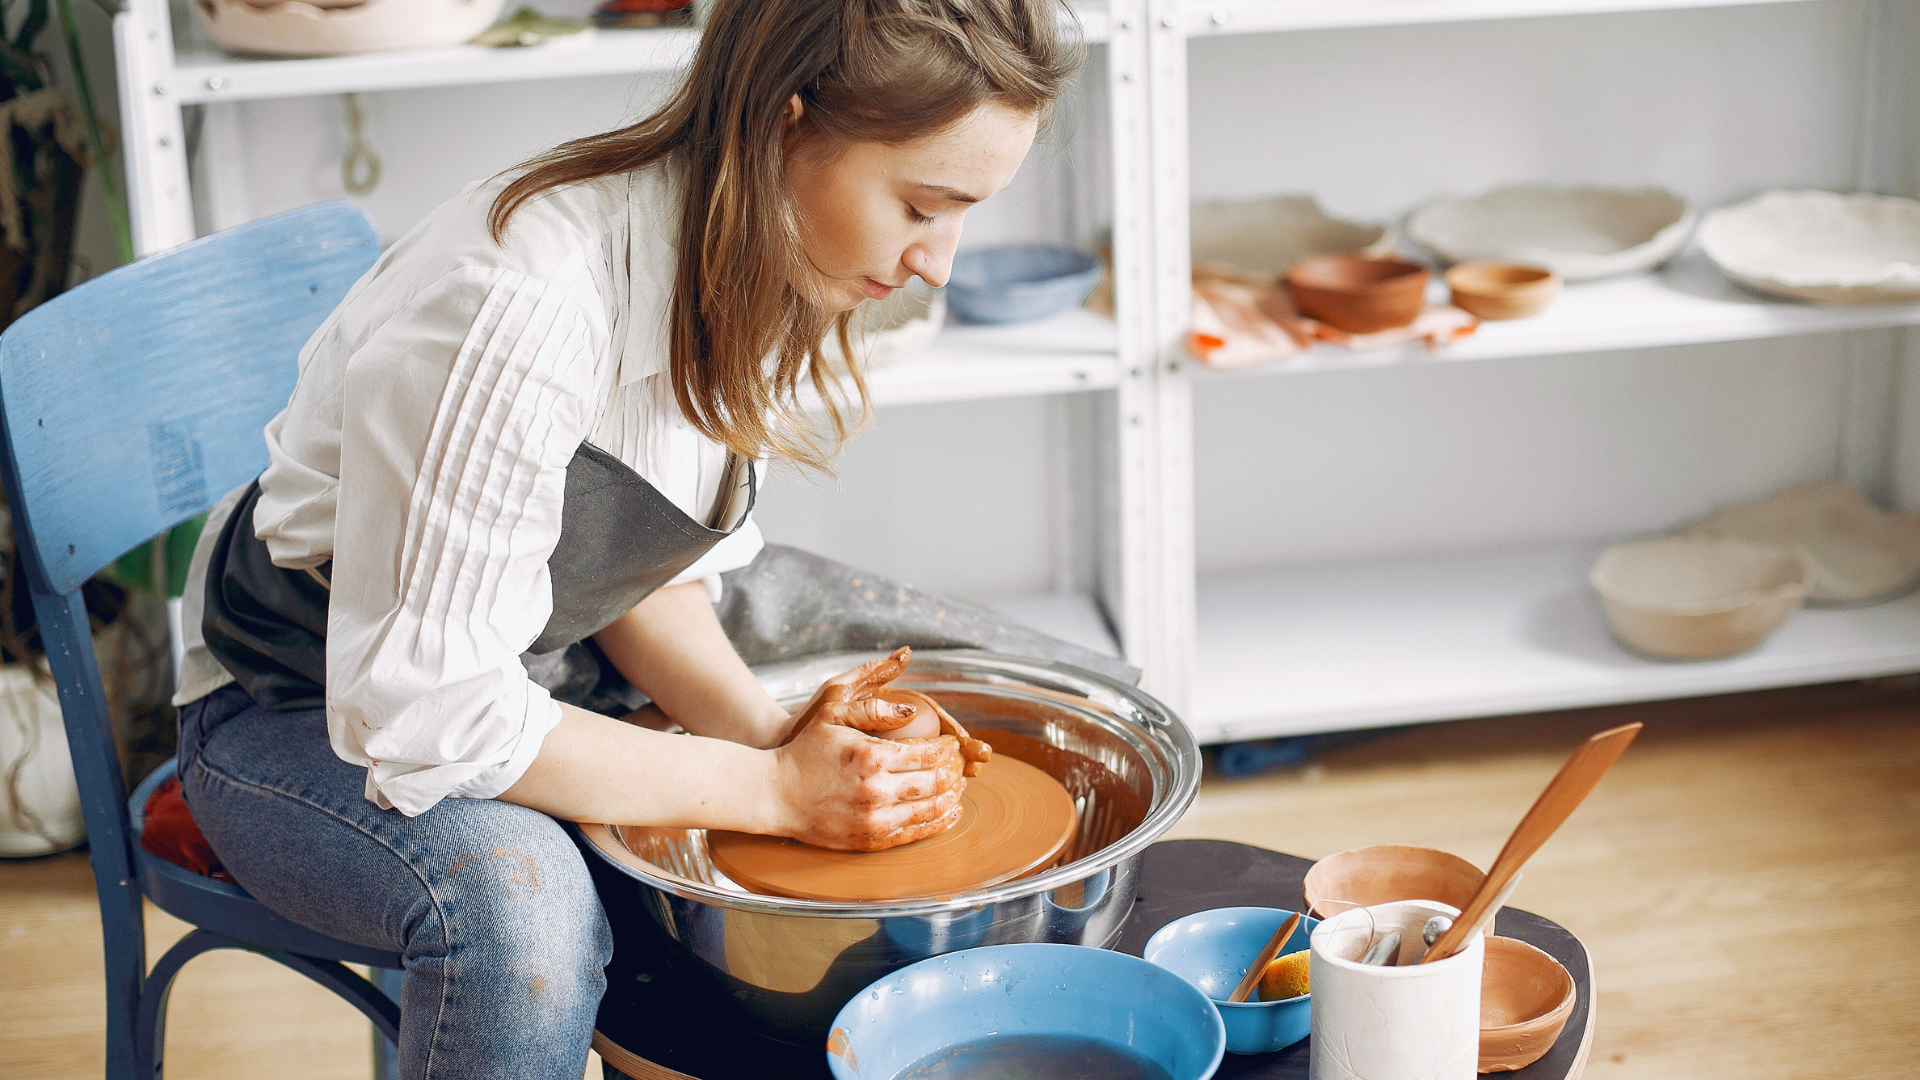
Throwing on the wheel is a dynamic and skillful technique for shaping pottery. It involves using a pottery wheel to spin the clay, allowing for even shaping as it rotates.
The artist centers the clay on the wheel head, gradually applying pressure to form the desired shape. This method requires practice to master the speed and pressure for creating symmetrical pieces.
Once the desired shape is formed, details can be added using various tools. Finishing touches may include creating lip designs or adding textures before the clay sets.
Drying and Bisque Firing
After shaping, the pottery must dry before the bisque firing process. Artists typically let pieces dry slowly to prevent cracks. Once the clay reaches a leather-hard state, it becomes easier to trim and refine.
Bisque firing is the first firing stage where the clay is heated at a lower temperature. This process changes the clay from a fragile state to a hardened form.
After bisque firing, pieces are ready for glazing. It is during this phase that the final artistic touches occur, preparing the work for its final firing, which gives it durability and a glossy finish.
Decorating and Glazing Techniques
This section explores various methods for enhancing pottery and ceramic art through decoration and glazing. Different techniques can add both function and aesthetic appeal to finished pieces.
Applying Underglazes and Stains
Underglazes offer a versatile way to introduce color to pottery. They are typically applied before glazing, allowing for more control over design. Artists can use brushes, sponges, or even stamps to add underglaze.
When applying underglazes, it’s important to apply thin layers. Multiple coats may be necessary to achieve the desired intensity. Afterward, the piece must be bisque-fired to set the color before glazing is added.
Craftspeople may also use ceramic stains, which provide a more opaque finish. Stains tend to be more durable than underglazes, making them suitable for functional ware. Mixing stains with a clear glaze can create unique effects.
Glaze Application Methods
There are several methods for applying glaze, including dipping, brushing, and spraying. Dipping is efficient for even coverage. This technique involves submerging the piece into the glaze, ensuring all areas are coated.
Brushing allows for precision and design versatility. With this method, the artist can create intricate patterns or linear designs. It’s essential to use a suitable brush, ensuring that it won’t scratch the surface.
Spraying is another option and is commonly used for larger pieces. It provides a smooth, even coat and allows for blending colors. Artists should wear protective equipment due to glaze aerosol particles.
Glaze Recipes and Mixes
Creating homemade glaze recipes can tailor the finish to specific projects. A basic glaze recipe often includes feldspar, silica, and clay. Variations can include additives like colorants or fluxes.
For a simple, clear glaze, a common mix is:
- Feldspar: 30%
- Silica: 40%
- Kaolin: 30%
Adjusting proportions can yield a range of effects. For example, increasing silica can enhance gloss. Experimentation is key to developing individual formulas.
Artists should document recipes for consistency. Testing new mixes on sample pieces is recommended to anticipate results before applying them to final projects.
Alternative Decorating Materials
Besides traditional underglazes and glazes, artists can utilize alternative decorating materials. Acrylic paints, while not food-safe if used on functional ware, can create bright, vibrant designs. They are ideal for non-functional decorative pieces.
Other materials like graphite, natural pigments, and oxides can be blended and applied to achieve diverse effects. These options offer unique textures and colors, expanding creative horizons.
Using these alternatives requires understanding their effects on clay during firing. Always conduct tests to ensure compatibility, preventing unexpected results. Additionally, the finished piece might require a clear glaze to protect the decoration.
Firing and Finishing
Firing and finishing are critical steps in creating pottery and ceramic art. This process ensures durability, influences aesthetics, and enhances the overall quality of the piece.
Understanding the Firing Process
Firing involves heating clay pieces in a kiln at high temperatures. This process transforms wet clay into a hardened, durable ceramic material.
Typically, there are two primary firing stages: bisque firing and glaze firing.
- Bisque Firing: This initial firing removes moisture and organic materials, typically reaching temperatures of around 1,800°F (982°C).
- Glaze Firing: This follows bisque firing and allows glazes to melt and bond to the clay, usually occurring at higher temperatures between 1,800°F to 2,300°F (982°C to 1,260°C).
Understanding firing temperatures is crucial, as they affect the final color and texture of the ceramic.
The Final Firing: Glaze Kilns
The final firing takes place in a glaze kiln, which is specifically designed for melting glazes. During this phase, the kiln temperature is closely monitored to achieve the desired finish.
Artists should consider several factors:
- Type of Kiln: Electric kilns, gas kilns, and wood-fired kilns each have unique firing characteristics.
- Glaze Selection: The choice of glaze influences surface texture and color. Each glaze has a recommended firing temperature that must be followed for optimal results.
- Cooling Rate: A controlled cooling period allows for better glaze effects and surface finishes.
Properly executing this final firing is essential for achieving the intended artistic vision.
Post-Firing Finishing Touches
After firing, artists often perform additional finishing steps to enhance their pieces.
Post-firing options include:
- Sanding: Smoothing rough edges or surfaces improves tactile quality.
- Adding Decorative Elements: This can involve painting, adding decals, or using additional glazes.
- Sealing: Applying a sealant helps maintain the piece’s integrity and adds luster.
Exploring these finishing techniques can open up new creative pathways for artists and enhance the overall appeal of their ceramic works.


